Master the optimization of existing contents with Semji.
Summary
Why optimize existing content?
How to optimize an existing content?
1) Select the opportunity or import the content url and choose the Focus Keyword
2) Transform the imported content into a draft
3) Assign content to a writer and plan its optimization
4) Follow the optimization recommendations to increase the Content Score
5) Approve content for publication (following your production workflow)
6) Integrate the content and its internal links into your CMS
7) Mark content "as Published" in Semji
8) Get your final Content Score
Why optimize existing content?
According to an Ahrefs study, updated in 2020, 91% of the pages produced on the web do not generate traffic. This is an alarming fact! Imagine that 90% of the writing efforts you and your team employ fall into limbo and that your content is forgotten almost as soon as it is published...
The reasons for this, in short:
- The lack of backlinks, which as we have seen when discussing the performance criteria of a content, are part of the MUST HAVE to bring authority to a page,
- But also the very "short term" nature of the subject matter, which does not allow the content to generate traffic or interest in a durable manner
- And finally, the fact that a lot of content is not focused on meeting a real user intent.
You have probably noticed that among these 3 criteria, two are closely linked to content production!
Thus, to quickly increase your traffic and your SEO performance, a ROI strategy consists in optimizing the existing content of your site. These already published contents can undoubtedly be reworked to include more strategic keywords, to better identify and target users' search intentions, and to better respond to them. All this, for a minimum of effort, because some of the content is already produced.
If you have spent 2 hours optimizing a content with Semji, and a few weeks later, it sees its traffic soar, the effort is under control and the gain is high: 2 hours well spent. It is therefore very "profitable" to take time to boost the performance of existing content that has potential.
In short, optimizing content allows you to capitalize on your existing writing efforts to maximize your earnings. Reverse the trend with optimization, and aim for 90% of performing content!
How to optimize an existing content?
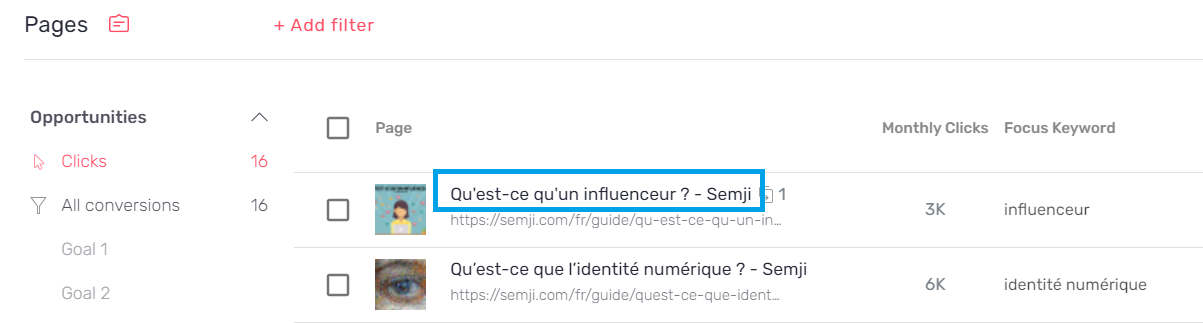
In Semji Platform, existing content that you optimize is found in the Opportunities section of the Pages tab. Once you have optimized and published them, you will see them appear in the Updated Content section of the Reports tab, as opposed to New Content (new content created from a blank page).
If you've understood the importance of optimizing existing content, you'll need to take action. Here are the steps to follow to optimize existing content from start to finish:
Step 1 : Select the opportunity or import the content url into Semji and choose the Focus Keyword
The first step is to know what content you are going to optimize to boost its performance. You can:
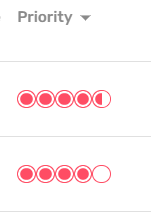
- Select priority contents from the url list that Semji has already imported for you (from 250 to 1000 urls with a Custom plan).To do so, sort these imported contents according to the KPI that best contributes to your business objectives: more clicks, conversions, transactions or more sales. Then check the priority score set by Semji, and choose contents with a high priority. These are contents with the best ratio editorial effort / gain.
- Import urls if your can't find your priority contents in Semji's import. Check our article about How to import a URL?.
Step 2: Transform the imported content into a draft
Once you have imported the content you want to optimize, you need to edit it. This means turning it into a Draft. To do so, two options :
1) Pages tab > Opportunities > click on your content's title
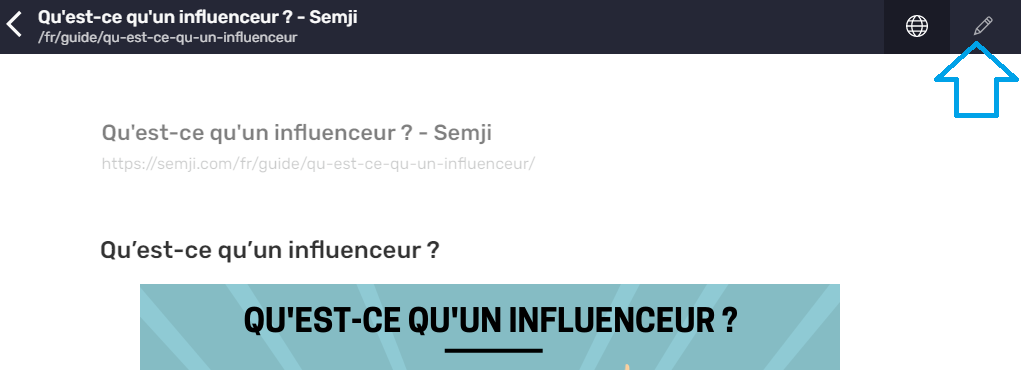
The contents of the page will appear on the screen. Make sure that all the relevant text you want to edit is displayed. If you encounter a problem with the display, for example if the text is only partially retrieved, contact your Customer Success Manager by email or via the Support service (online chat).
To edit your content, click on the pen icon at the top middle of your screen.
Click on the "Start Optimizing" button to get into the editor.
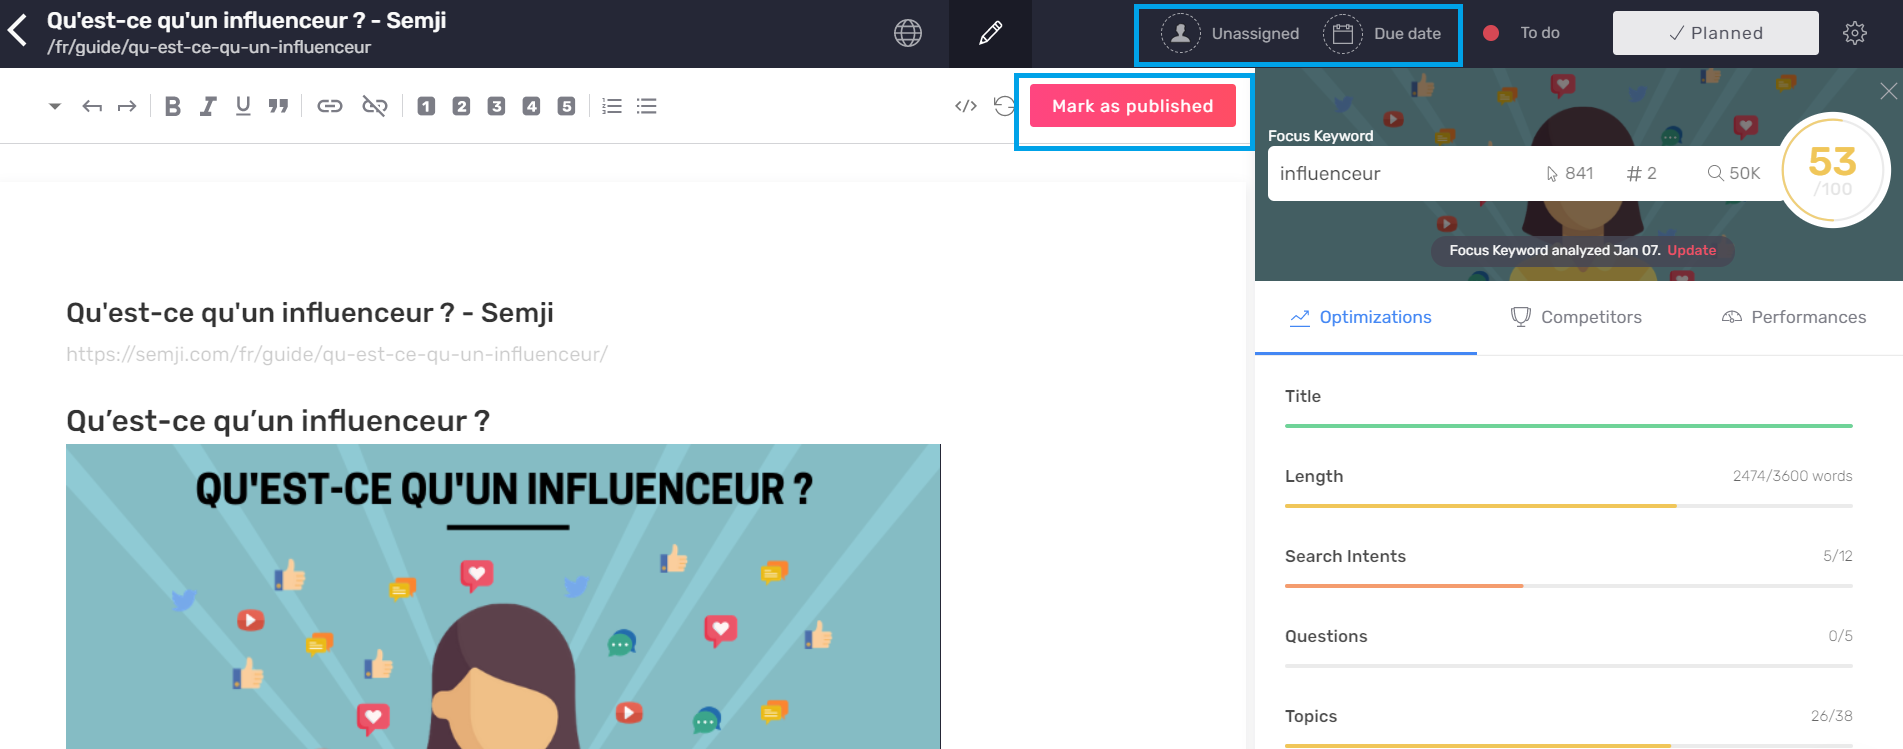
The draft editing interface gives you access to several features:
- the assignment of the draft to a person of your team
- the addition of a Due Date
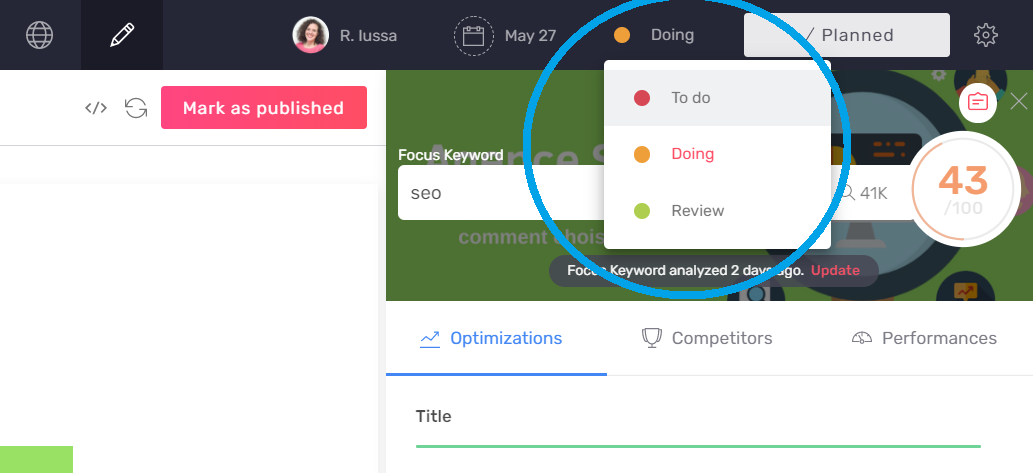
- the status of the content in your workflow (To do, Doing, Done…)
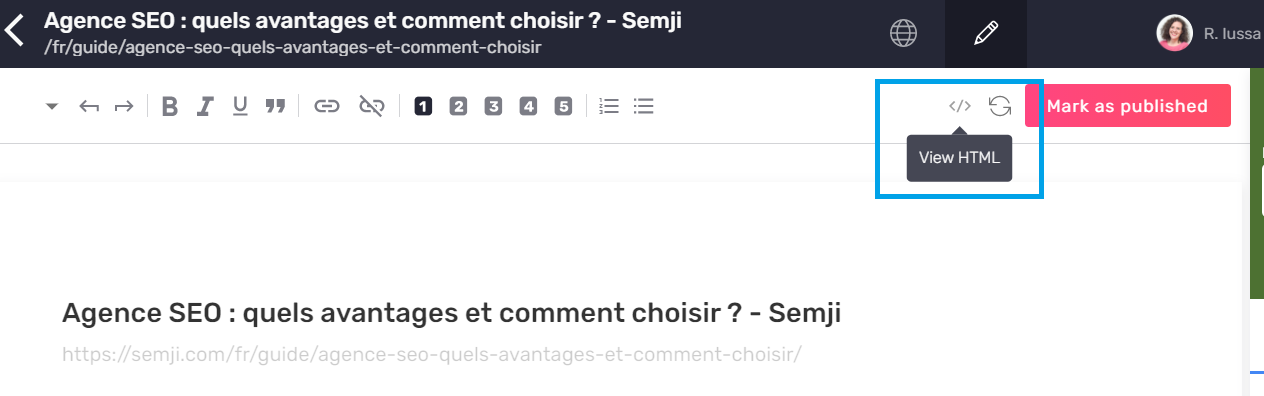
- access to the HTML code
- and of course the possibility to click on the "Mark as Published" button at the bottom of the page (to be kept as a last step, once the content is written, integrated in your CMS and published online)
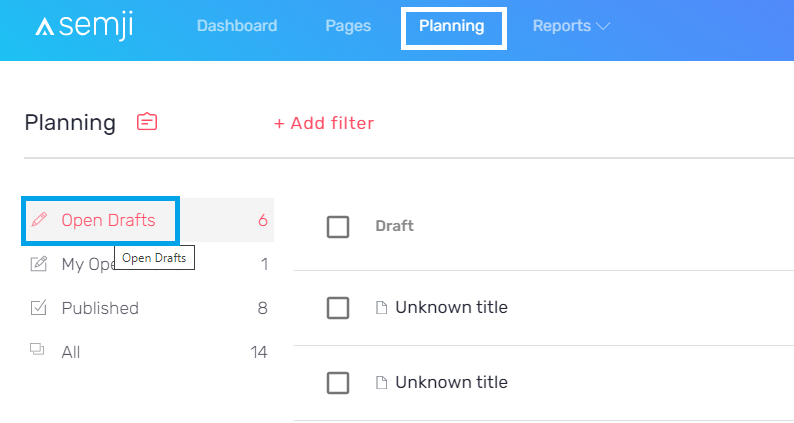
The draft that has just been created can be accessed directly from the Planning tab if you want to find it later and continue editing it.
Step 3: Assign content to a writer and plan its optimization
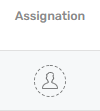
Once you have transformed your content into a Draft, make sure you assign it to the person responsible for its optimization: yourself or someone from your team. To do so, from the content Draft or directly from the Planning tab, click on the Assignment icon :
The different members of your team appear in a drop-down menu. All you have to do is choose the person responsible for content optimization.
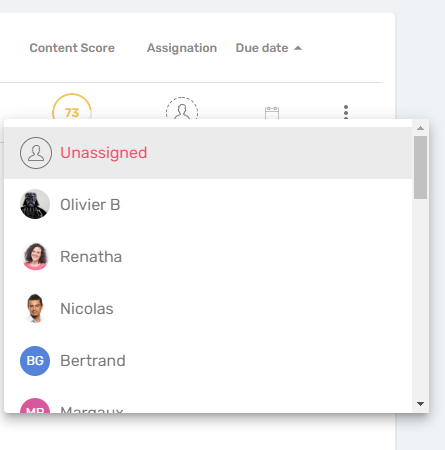
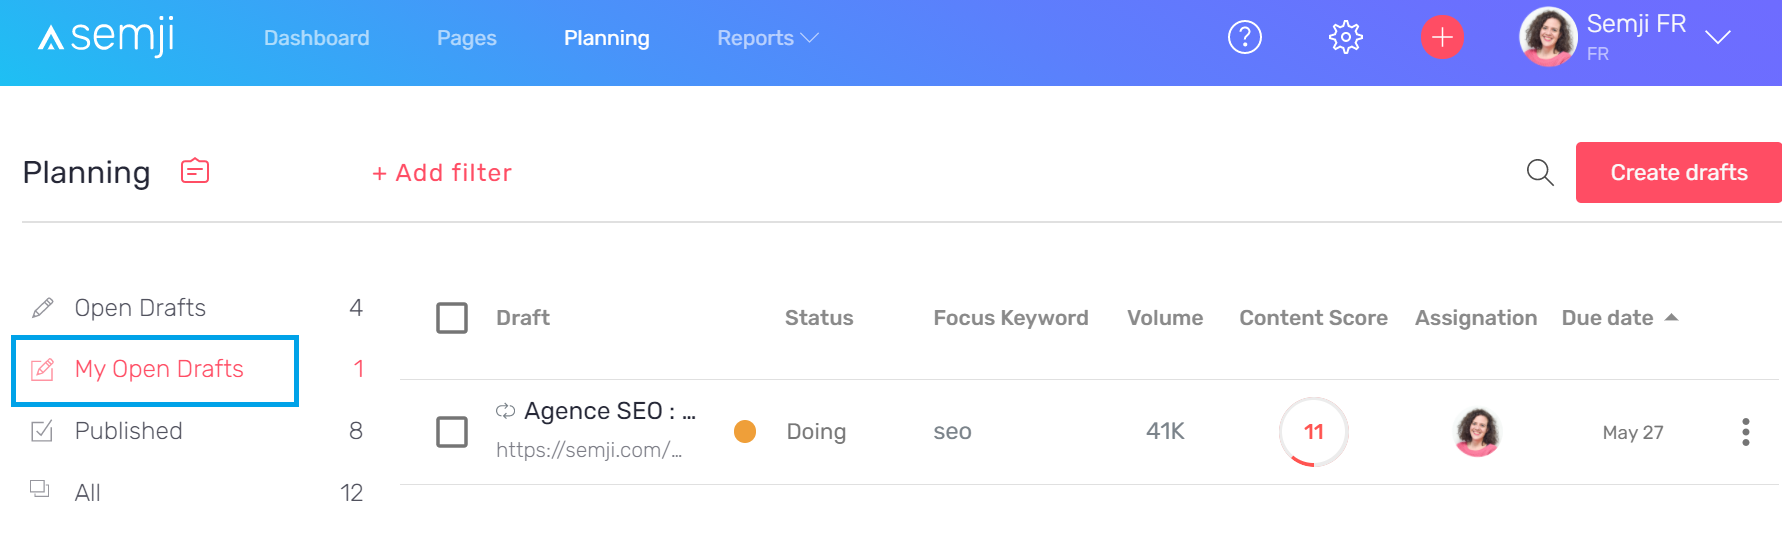
Note: if some members of your organization have an "External" status, they will only be able to edit content that have been assigned to them. Contents will then be visible in the "My Open Drafts" section. Without this assignment, these users will not see the list of imported content and will not be able to edit it.
It is also a good practice to enter the Due Date associated with the Draft, so that you can see at a glance in your schedule the content that is late or on time, and thus better control your production.
Once the content has been assigned and scheduled, and thanks to the macro view provided by "Open Drafts", the team supervisor can check all the content being optimized for each member of his or her team, check that each piece of content has a responsible person and that the production deadlines are being met.
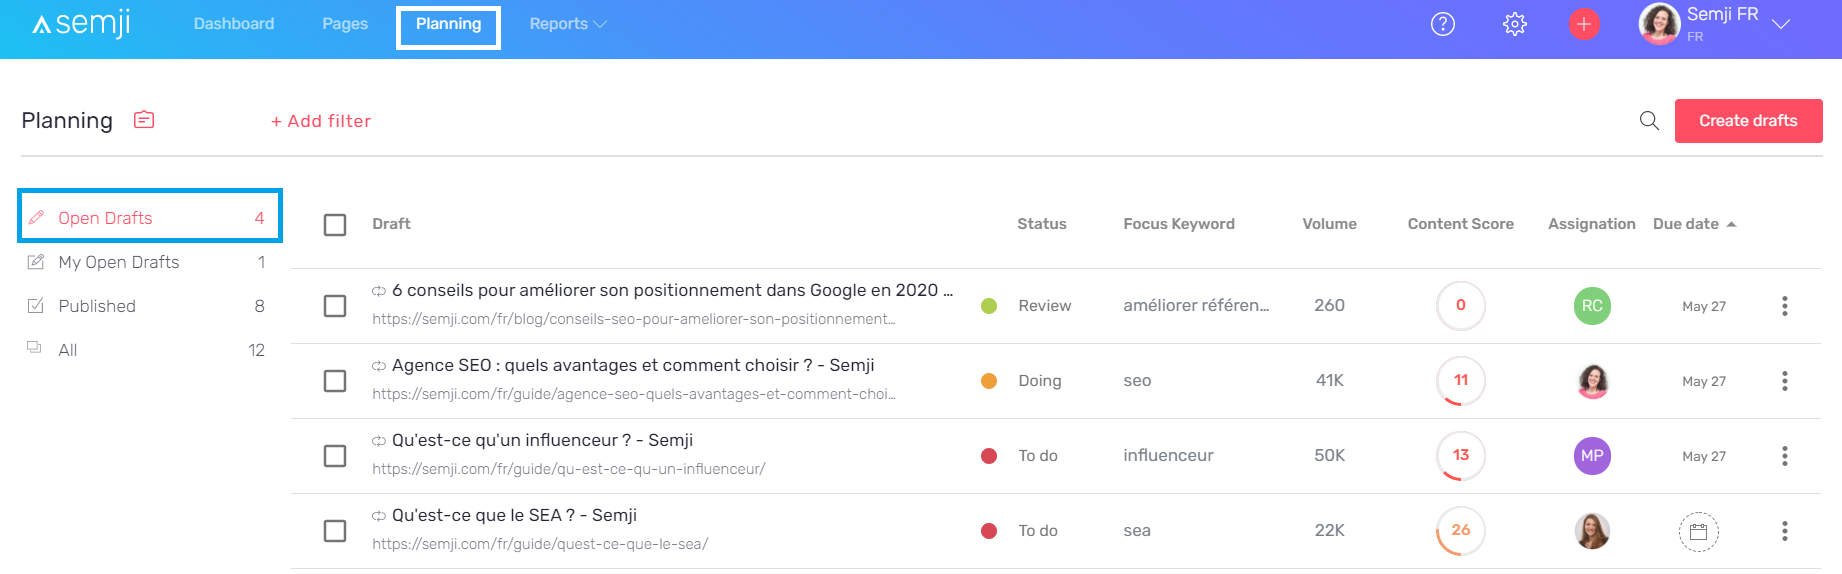
Each member of your team can view the content assigned to them in "My Open Drafts".
Step 4: Follow the optimization recommendations to increase the Content Score
The draft is created and you can start optimizing the imported content.
In the editor interface, the Semji platform provides you with a set of concrete recommendations, based on the analysis launched at the time of import, after the choice of the Focus Keyword.
Apply these recommendations to see the Content Score of your content evolve in real time:
Note that these last two recommendations can only be validated and make the Content Score evolve after the content publication phase and the integration of internal links in your CMS (see step 6 below).
See also our article "What is a well optimized content for SEO?" to guarantee your content a maximum performance.
Step 5 : Approve content for publication (following your production workflow)
After applying all the platform's recommendations to achieve a Content Score as close to 100 as possible, make sure you continue your production workflow: should your content be reviewed by another department? by a supervisor? Should it be published directly?
By entering a new status for your content, you are indicating that you have completed the optimization and are ready to move on to the next step.
Note: you can customize the statuses of a draft, in order to fit your internal production process. For example, if you include a review phase by your legal department before publishing the content, a new status can be created to indicate this step. The writer who has finished optimizing a piece of content simply selects this status "Legal Review" and you will know at a glance where your content stands in your overall process.
Step 6: Integrate the content and its internal links into your CMS
When you are sure that your content is complete, the next step is to integrate it into your CMS. You can either copy and paste the whole text you have written in the Semji editor - Hn title tags are normally kept and applied automatically in your CMS editor - or switch to HTML preview and copy the source code of the produced text.
To do so, use the button at the top right of the editor interface:
Be sure to include links to other pages on your site, which will allow you to apply Semji's "Outgoing Links" recommendation. But also consider the "Incoming Links" recommendation: add links to the content you publish on other existing pages of your site.
Thus, integrating optimized content with Semji usually means editing several other contents when integrating in your CMS.
Step 7: Mark content "as Published" in Semji
Once the content is published in your CMS, go back to the corresponding Semji Draft. Then click on the "Mark as Published" button at the bottom of the content.
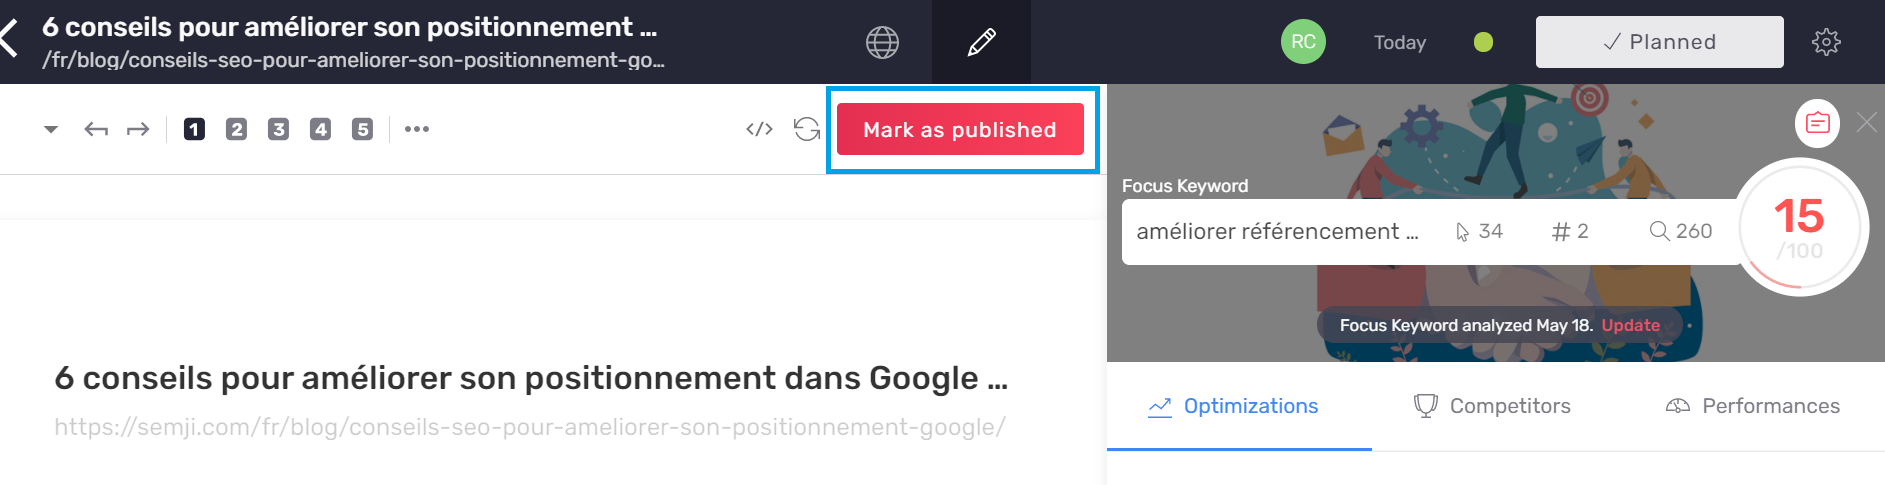
A window containing the url of your existing content asks you to confirm the publication of the content online.
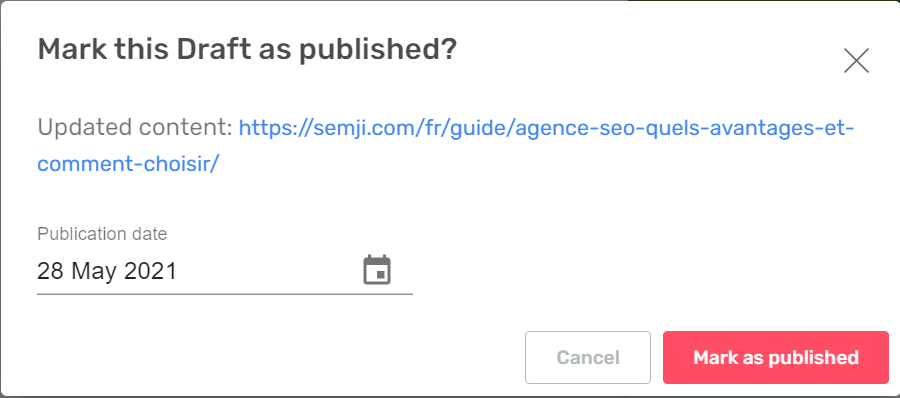
This step is very important to allow you to track the performance of your content with Semji: by clicking on "Mark as Published" on the day of the publication of your optimizations, you allow the platform to show the Before and After optimization in the performance tracking (Reports tab). You can then calculate the real gain obtained thanks to your efforts: the ROI of your content optimization!
Step 8: Get your final Content Score
The very last step in optimizing an existing content is to obtain your final Content Score. This is made possible thanks to the integration of the internal links you have made from your CMS (the addition of inbound and outbound links to your content).
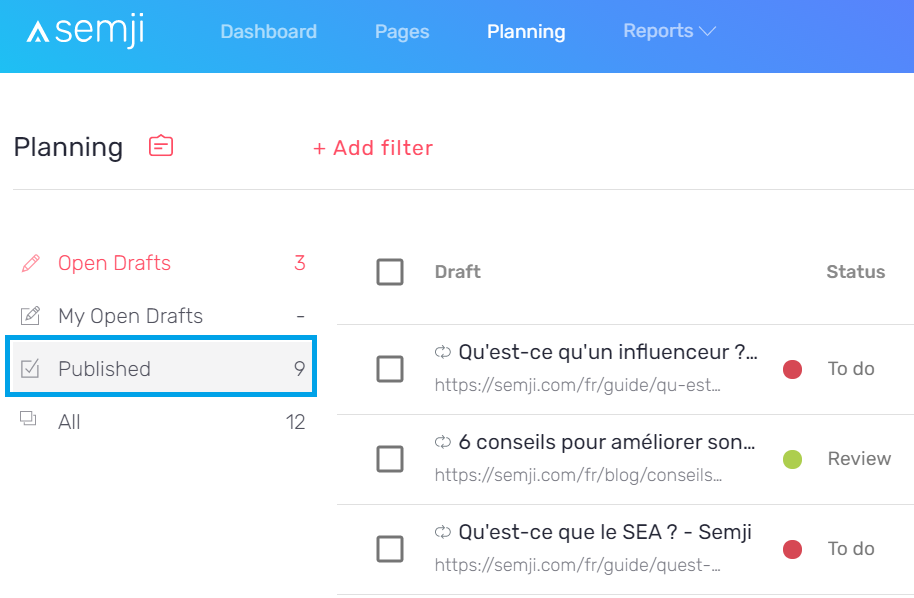
Since you have clicked on "Mark as Published", your content is now accessible from the "Published" section of your Planning tab.
Click on the content you just published to view it. At the top right of your Publisher window, a button allows you to restart the synchronization: Semji compares the created draft with the online content version.
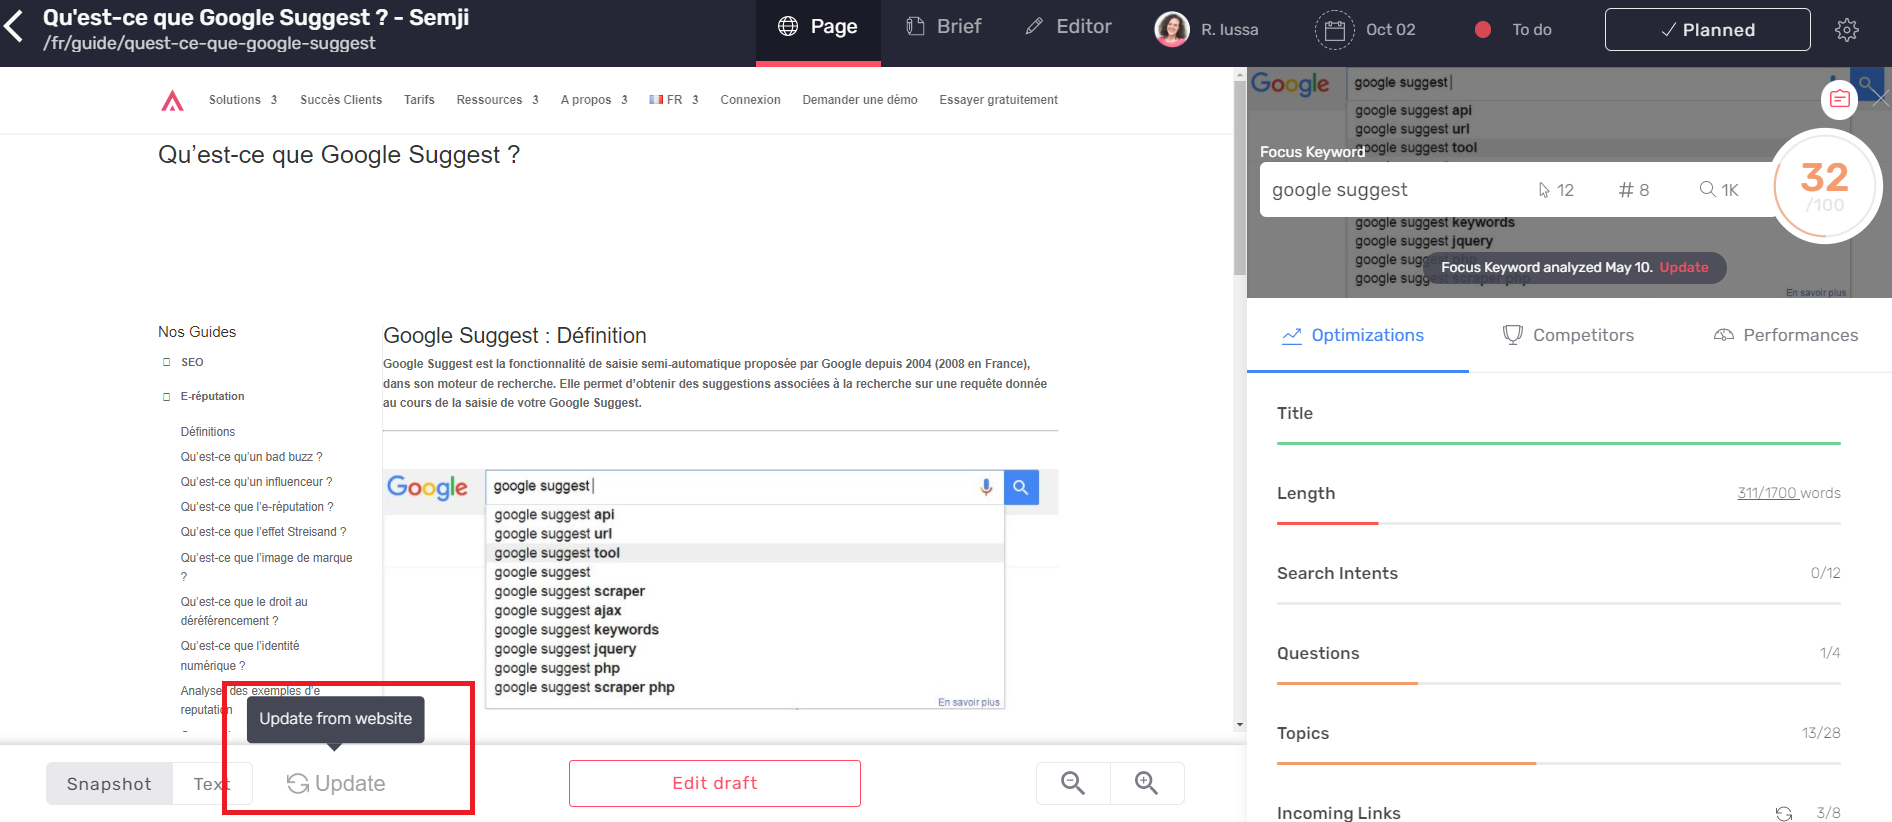
During this comparison, the platform can see that the Incoming Links and Outgoing Links have been integrated according to its recommendations. The Content Score then evolves to become your final Content Score. It takes into account all the optimizations made on your content.
Congratulations, you have fully optimized your first content with Semji!